LISTEN TO THIS STORY:
This guide is specifically for Envoy 2 E Series devices. Other MegaVoice devices may have different formatting requirements. Feel free to contact us for help formatting audio for your device.
Creating custom audio content allows you to provide personalized, highly-relevant information for your audio Bible recipients. Customized health and/or hygiene instructions or teachings by local pastors in regional languages/dialects can help strengthen the local church.
But before you can get your custom audio in the hands of those who need it, you need to make sure it can easily be accessed and navigated on your MegaVoice Envoy 2 E Series device.
Preparing Your Audio
Your device has a limited amount of space:
• A blank 4GB MegaVoice device has a maximum of 3.72GB of available space for your custom content.
• A blank 8GB MegaVoice device has a maximum of 7.45GB of available space for your custom content.
You can adjust the quality of your audio files in order to fit them on your device.
The lower your audio quality, the smaller your final audio file size will be.
You can use this audio converter (or something similar) to adjust the quality of your audio.
Formatting Your Audio
Now that your audio is converted, it’s time to format it!
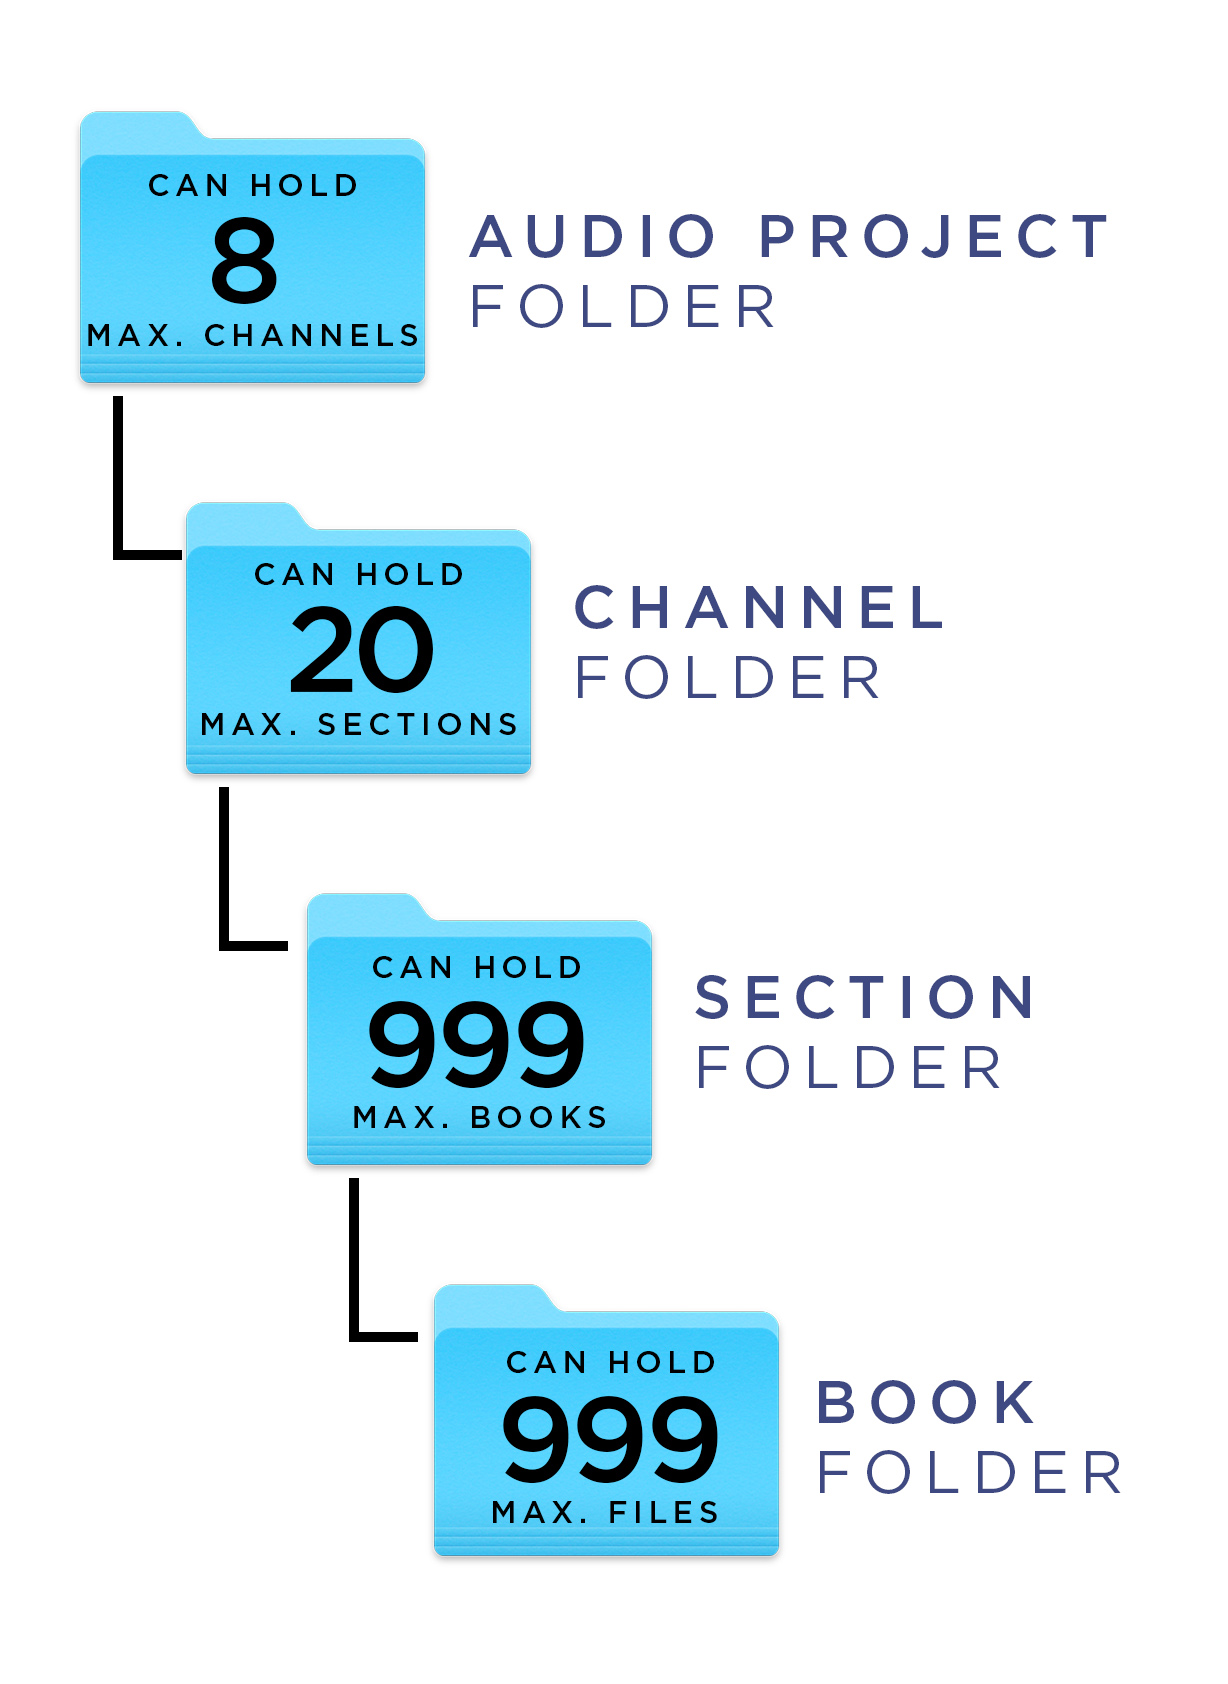
By using a very specific folder structure, you can make your audio easily played and navigated by the MegaVoice keypad.
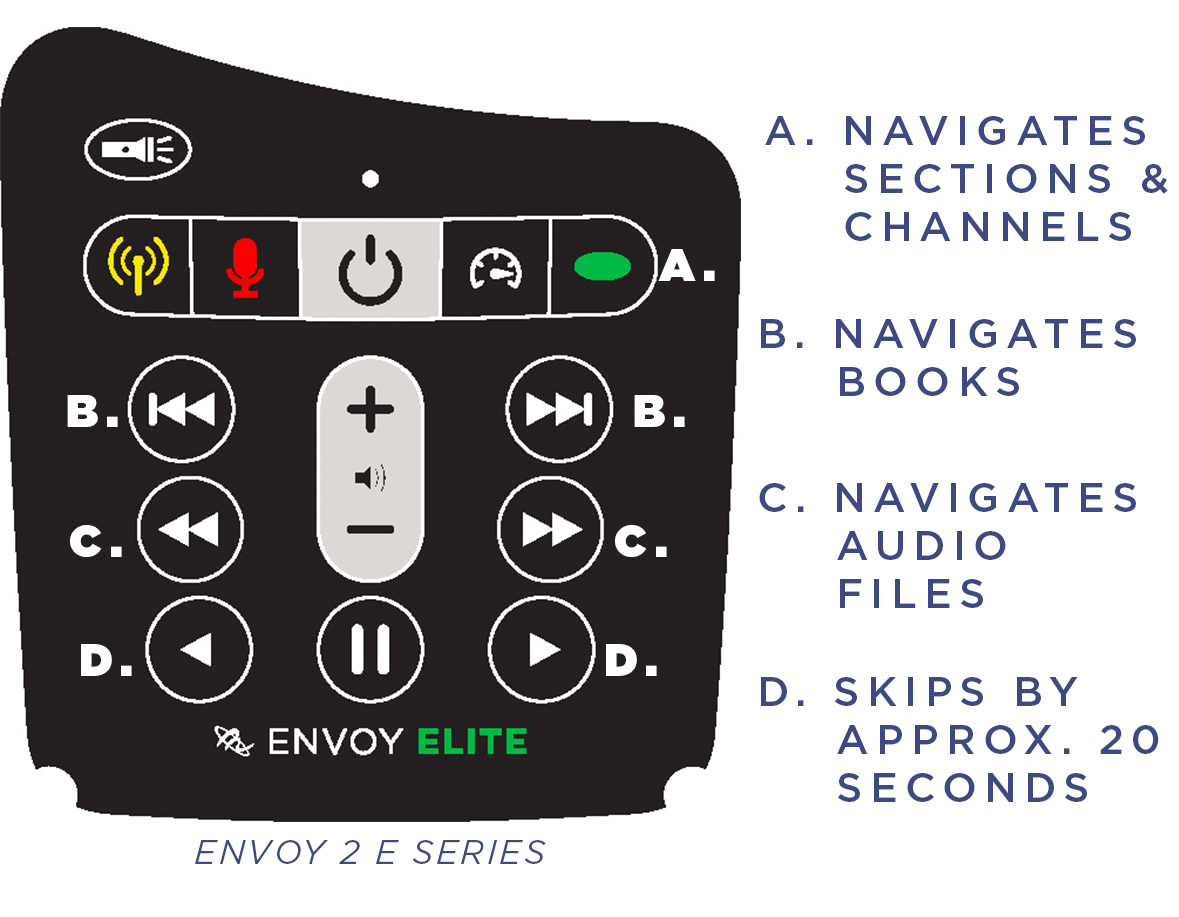
The Section button (marked A. in the image below) scrolls through the different Channels you create in your Audio Project folder as well as Sections. A quick click on this button will jump forward to the next Section, while a 2-second press will jump forward to the next Channel.
The Book buttons (marked B. in the image below) scroll through your Books.
The Chapter buttons (marked C. in the image below) skip through your audio files (our audio Bibles use one audio file for each chapter of scripture).
And finally, the Quick Jump buttons (marked D. in the image below) will fast-forward or rewind about 20 seconds within those audio files.
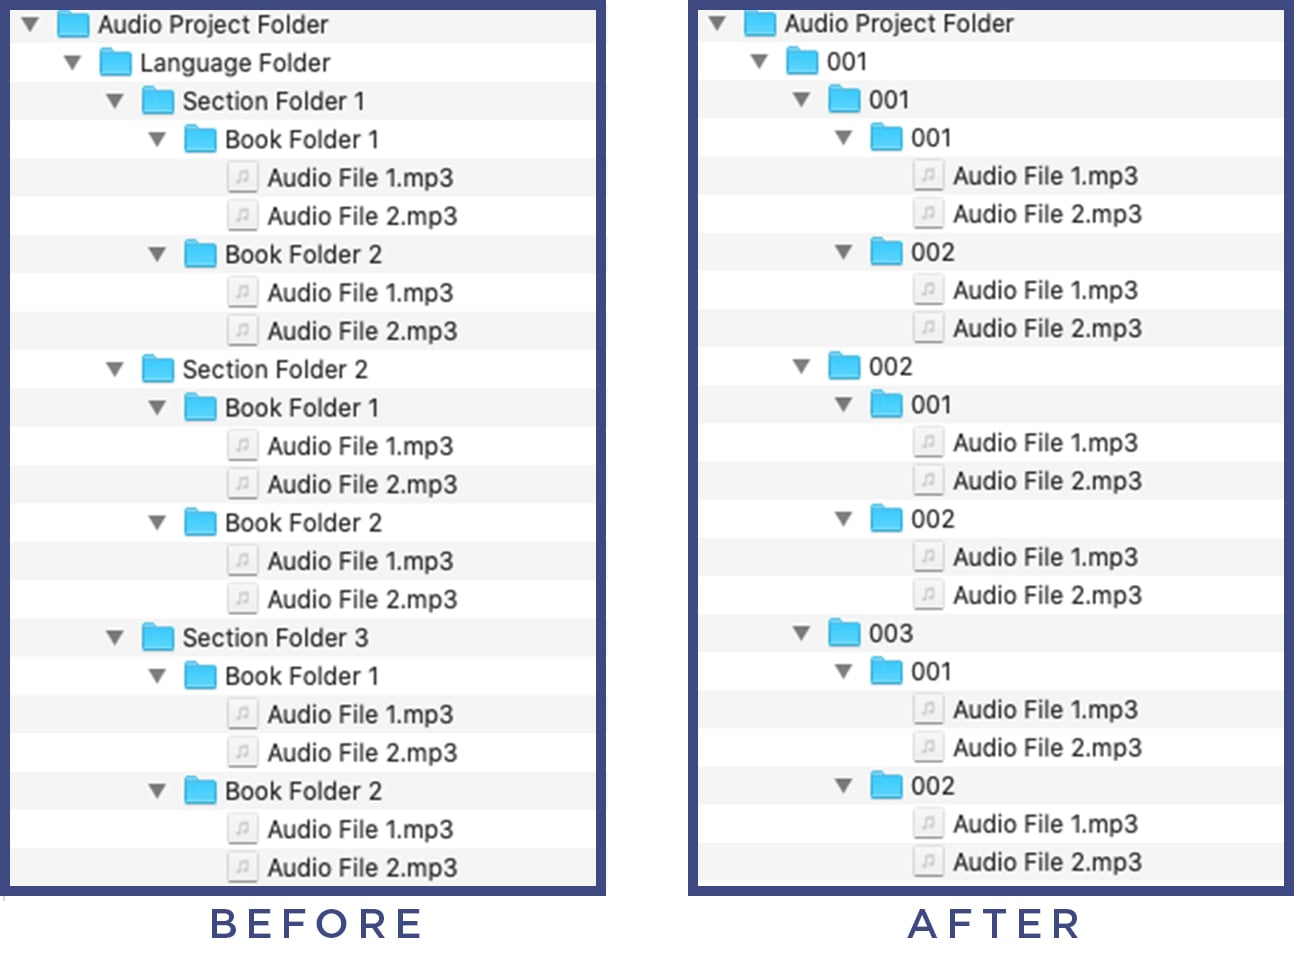
Once you have structured your audio folders the way you want, you can begin renaming them. Remember: Duplicate your Audio Project Folder before you begin so you don’t lose the structure you’ve built with complete folder names.
The Channel, Section, and Book Folders all need to be renamed with 3-digit consecutive numbers (001, 002, 003…). See the before and after example below.
If you have a large number of folders, you can use a renaming software like Free File Renamer or our own SaberCopy to help speed up the process.
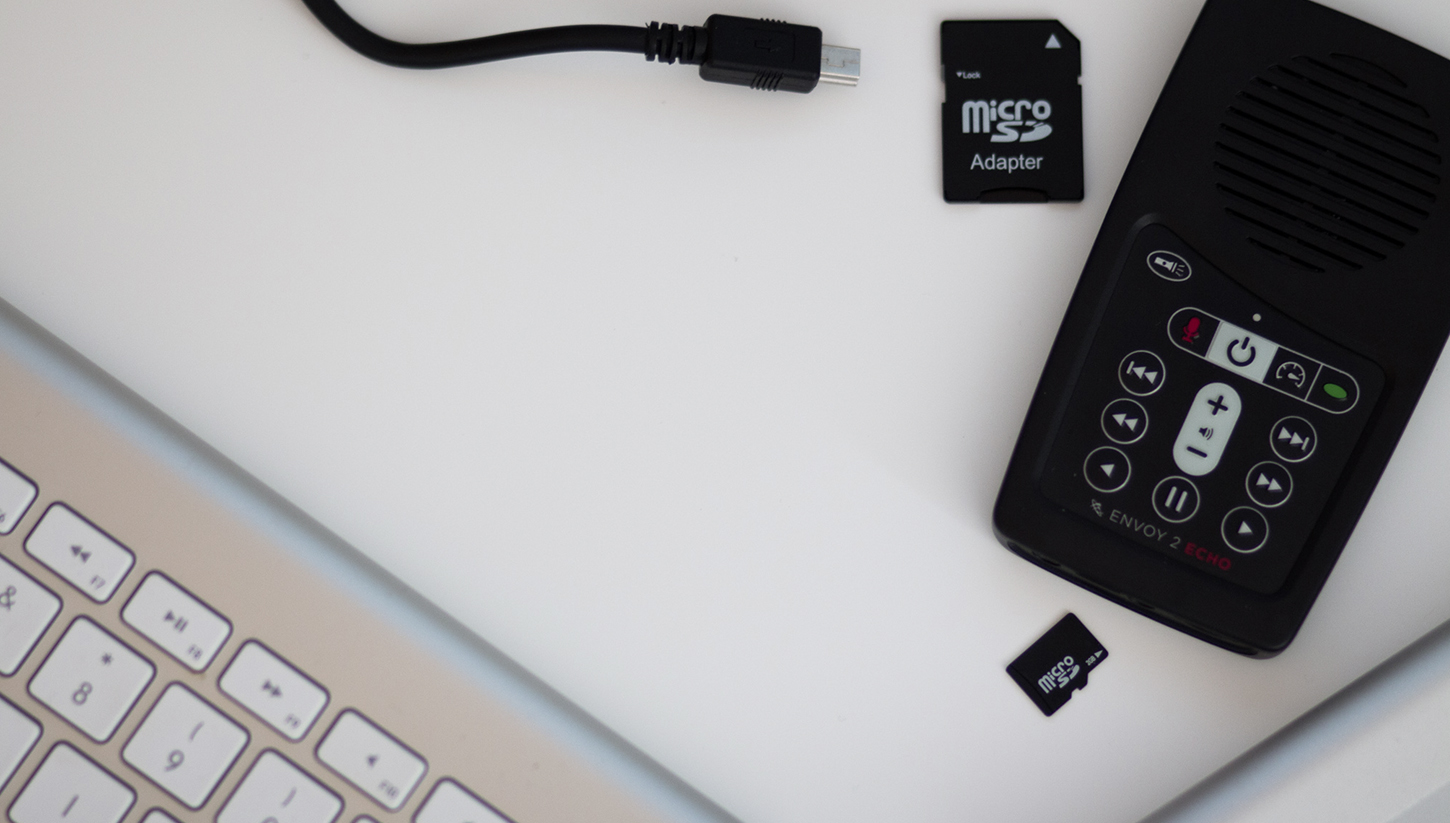
Your content is now ready to be loaded! Plug in your microSD card or your Envoy 2 E series device!
If you need more technical assistance, email us at info@megavoice.com. We’d be happy to help!


